23Sep
Making an Arch in 3DS MAX
admin2024-09-23T10:46:27+00:00Step 1: Create a Basic Rectangle
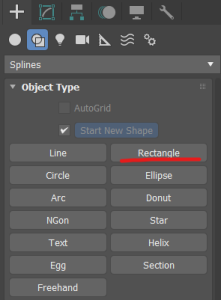
Go to Create -> Shapes -> Rectangle.

- Draw a rectangle of your desired size.
Step 2: Convert to Editable Spline
- Right-click on the rectangle and select Convert to Editable Spline.
Step 3: Create the Arch
- Select the top two vertices of the rectangle.
- Go to Edit -> Fillet.
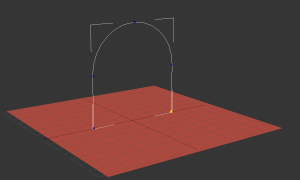
- Adjust the Fillet Amount to create the desired arch shape
- Select Segment�and delete the bottom segment.
- Tip: Use the Snap to Grid option for precise placement.

Step 4: Extrude the Arch
- Enable In Viewport and select Rectangular to see the arch in viewport.
- Select the entire arch (or the Editable Spline).
- Go to Modify -> Editable Poly -> Selection.
- Select the outer polygons of the arch.
- Go to Modify -> Editable Poly -> Extrude.
- Set the Height to your desired value.
- Tip: Experiment with other options such as Group/By Polygon to control the direction of the extrusion.


Leave a Reply